Welcome back to our Laravel 12 Task Manager series! In Part 1, we set up our development environment and created our first Laravel project. Now it’s time to build the foundation of our application with user authentication and a proper database structure.
By the end of this tutorial, you’ll have a fully functional authentication system and understand how to design database tables for your Task Manager application.
What You’ll Learn in This Tutorial
- Installing and configuring Laravel Breeze for authentication
- Understanding authentication scaffolding
- Creating database migrations for tasks
- Designing relationships between users and tasks
- Understanding Eloquent ORM and models
- Working with migration files
- Testing your authentication system
Prerequisites
Before starting this tutorial:
- Completed Part 1: Environment Setup and Installation
- Laravel 12 project running locally
- Database configured and connected
- Basic understanding of MVC architecture
If you haven’t completed Part 1, go back and set up your environment first!
Why Authentication Matters
User authentication is crucial for any web application. It allows us to:
- Identify individual users
- Protect sensitive data
- Personalize user experiences
- Track user-specific tasks
- Implement authorization and permissions
Laravel makes authentication incredibly simple with its built-in packages.
Understanding Laravel Breeze
Laravel offers several authentication options:
- Laravel Breeze – Minimal, simple authentication scaffolding (we’ll use this)
- Laravel Jetstream – More features, including teams and API support
- Laravel Fortify – Headless authentication backend
- Custom Authentication – Build your own from scratch
Why Breeze? It’s perfect for beginners – lightweight, easy to understand, and provides all essential features without overwhelming complexity.
Step 1: Installing Laravel Breeze
Let’s start by installing Laravel Breeze in our Task Manager project.
1.1 Install Breeze via Composer
Open your terminal, navigate to your project directory, and run:
cd task-manager
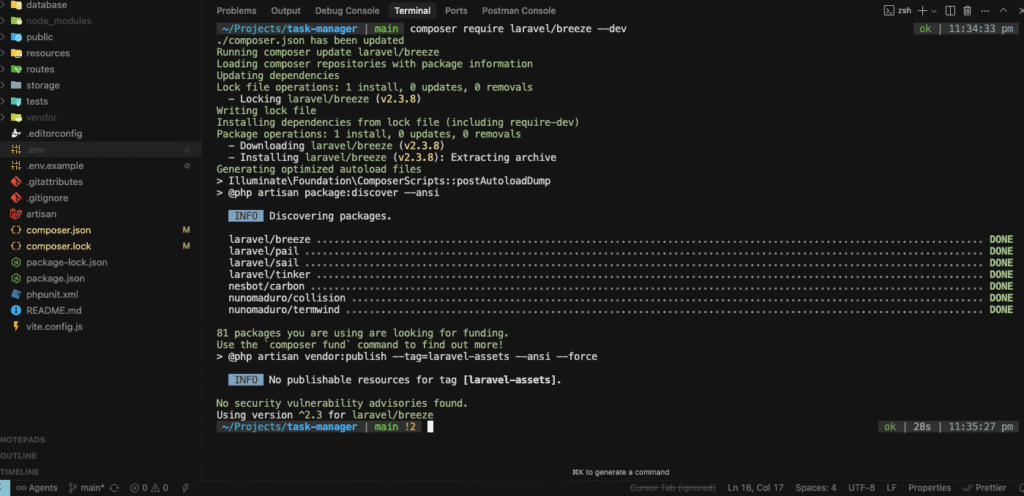
composer require laravel/breeze --dev
This command installs Breeze as a development dependency. You’ll see Composer downloading the package and its dependencies.
Expected output:
Using version ^2.x for laravel/breeze
./composer.json has been updated
Loading composer repositories with package information
Updating dependencies
...
Package operations: 1 install, 0 updates, 0 removals
1.2 Install Breeze Scaffolding
Now let’s install the Breeze scaffolding. Breeze offers different stacks – we’ll use Blade (Laravel’s templating engine):
php artisan breeze:install blade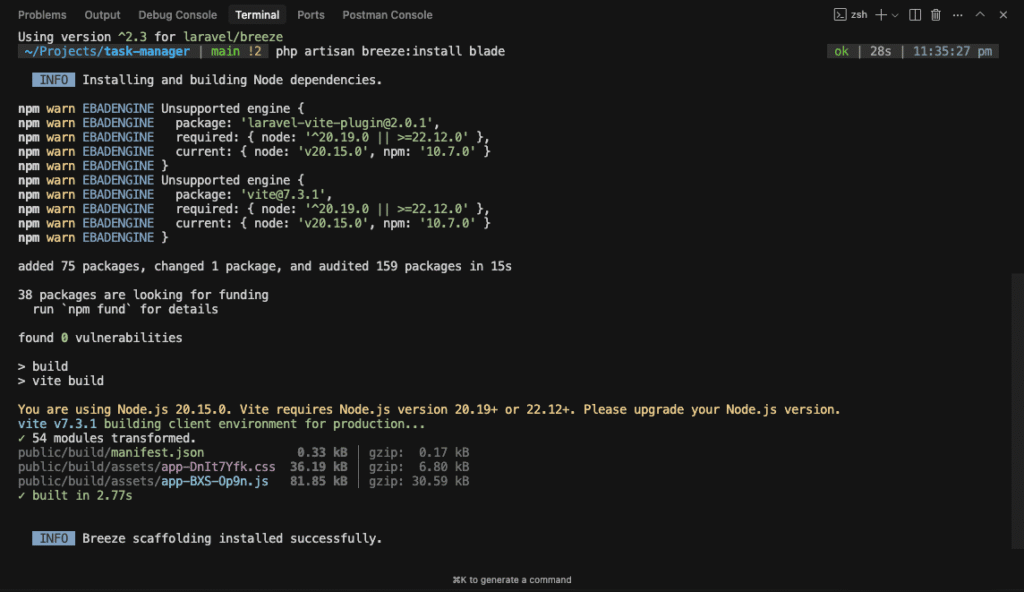
What just happened? Breeze installed:
- Login and registration views
- Controllers for authentication
- Routes for auth endpoints
- Tailwind CSS for styling
- Alpine.js for interactivity
1.3 Install and Compile Frontend Dependencies
Breeze uses Tailwind CSS for styling. Let’s install and compile the assets:
npm install
npm run dev
Keep the npm run dev process running in a separate terminal window. This watches for file changes and automatically recompiles assets.
1.4 Run Migrations
Breeze includes migrations for authentication tables. Let’s run them (If not migrated automatically):
php artisan migrate
You’ll see new tables being created:
Migrating: 2019_12_14_000001_create_personal_access_tokens_table
Migrated:  2019_12_14_000001_create_personal_access_tokens_table (45.67ms)
Migrating: 2024_01_01_000000_create_cache_table
Migrated:  2024_01_01_000000_create_cache_table (23.45ms)
Migrating: 2024_01_01_000001_create_jobs_table
Migrated:  2024_01_01_000001_create_jobs_table (67.89ms)
Step 2: Testing Authentication
Let’s verify that authentication is working correctly.
2.1 Start Your Development Server
If not already running:
php artisan serve
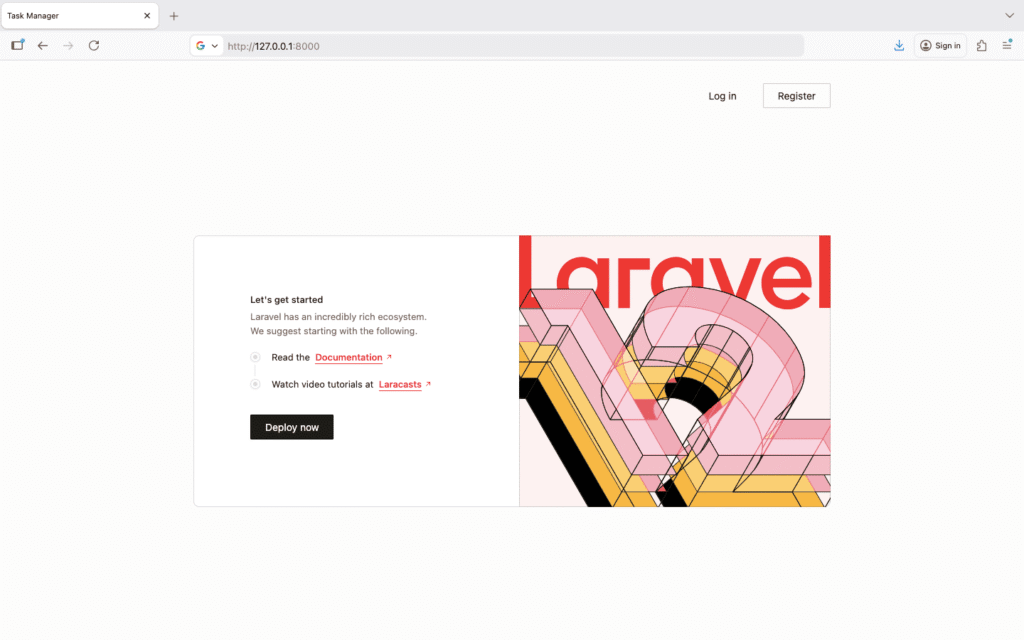
2.2 Access the Application
Open your browser and visit: http://localhost:8000 or http://127.0.0.1:8000
You should now see:
- A Register link in the top right
- A Log in link next to it
2.3 Create Your First User
- Click Register
- Fill in the registration form:
- Name: Your Name
- Email: your.email@example.com
- Password: password123 (minimum 8 characters)
- Confirm Password: password123
- Click Register
You should be automatically logged in and redirected to the dashboard!
2.4 Explore Authentication Features
Laravel Breeze provides these pages out of the box:
-
Dashboard (
/dashboard) – Protected route, only accessible when logged in -
Profile (
/profile) – Update user information and password -
Login (
/login) – Sign in existing users -
Register (
/register) – Create new accounts - Forgot Password – Password reset functionality
- Logout – Sign out functionality
Try navigating to these pages and testing the functionality.
Step 3: Understanding the Authentication Flow
Let’s understand what’s happening behind the scenes.
Authentication Routes
Open routes/auth.php:
<?php

use App\Http\Controllers\Auth\AuthenticatedSessionController;
use App\Http\Controllers\Auth\RegisteredUserController;
// ... other imports

Route::middleware('guest')->group(function () {
    Route::get('register', [RegisteredUserController::class, 'create'])
        ->name('register');

    Route::post('register', [RegisteredUserController::class, 'store']);

    Route::get('login', [AuthenticatedSessionController::class, 'create'])
        ->name('login');

    Route::post('login', [AuthenticatedSessionController::class, 'store']);

    // ... more routes
});

Route::middleware('auth')->group(function () {
    Route::post('logout', [AuthenticatedSessionController::class, 'destroy'])
        ->name('logout');

    // ... more routes
});
Key concepts:
-
middleware('guest')– Routes only accessible to non-authenticated users -
middleware('auth')– Routes only accessible to authenticated users - Controllers handle the logic for each action
User Model
Open app/Models/User.php:
<?php

namespace App\Models;

use Illuminate\Foundation\Auth\User as Authenticatable;

class User extends Authenticatable
{
    protected $fillable = [
        'name',
        'email',
        'password',
    ];

    protected $hidden = [
        'password',
        'remember_token',
    ];

    protected function casts(): array
    {
        return [
            'email_verified_at' => 'datetime',
            'password' => 'hashed',
        ];
    }
}
Understanding the code:
-
$fillable– Columns that can be mass-assigned -
$hidden– Attributes hidden from JSON responses -
casts()– Automatically cast attributes to specific types -
passwordis automatically hashed when set
Step 4: Database Planning for Task Manager
Before creating migrations, let’s plan our database structure.
Tables We Need
1. users (already created by Breeze)
- id
- name
- password
- email_verified_at
- remember_token
- created_at
- updated_at
2. tasks (we’ll create this)
- id
- user_id (who created the task)
- title
- description
- priority (low, medium, high)
- status (pending, in_progress, completed, archived)
- due_date
- created_at
- updated_at
3. categories (for organizing tasks)
- id
- user_id
- name
- color
- created_at
- updated_at
4. task_category (pivot table for many-to-many relationship)
- task_id
- category_id
5. task_shares (for sharing tasks between users)
- id
- task_id
- shared_by_user_id
- shared_with_user_id
- permission (view, edit)
- created_at
- updated_at
6. attachments (for file uploads)
- id
- task_id
- user_id
- file_name
- file_path
- file_size
- mime_type
- created_at
- updated_at
Database Relationships Diagram
users
  |
  |-- has many --> tasks
  |-- has many --> categories
  |-- has many --> task_shares (as sharer)
  |-- has many --> task_shares (as recipient)

tasks
  |-- belongs to --> user
  |-- belongs to many --> categories
  |-- has many --> attachments
  |-- has many --> task_shares

categories
  |-- belongs to --> user
  |-- belongs to many --> tasks

attachments
  |-- belongs to --> task
  |-- belongs to --> user
Step 5: Creating the Tasks Migration
Let’s create our first custom migration for the tasks table.
5.1 Generate Migration File
php artisan make:migration create_tasks_table
Output:
Created Migration: 2026_01_18_123456_create_tasks_table
This creates a new file in database/migrations/ with a timestamp prefix.
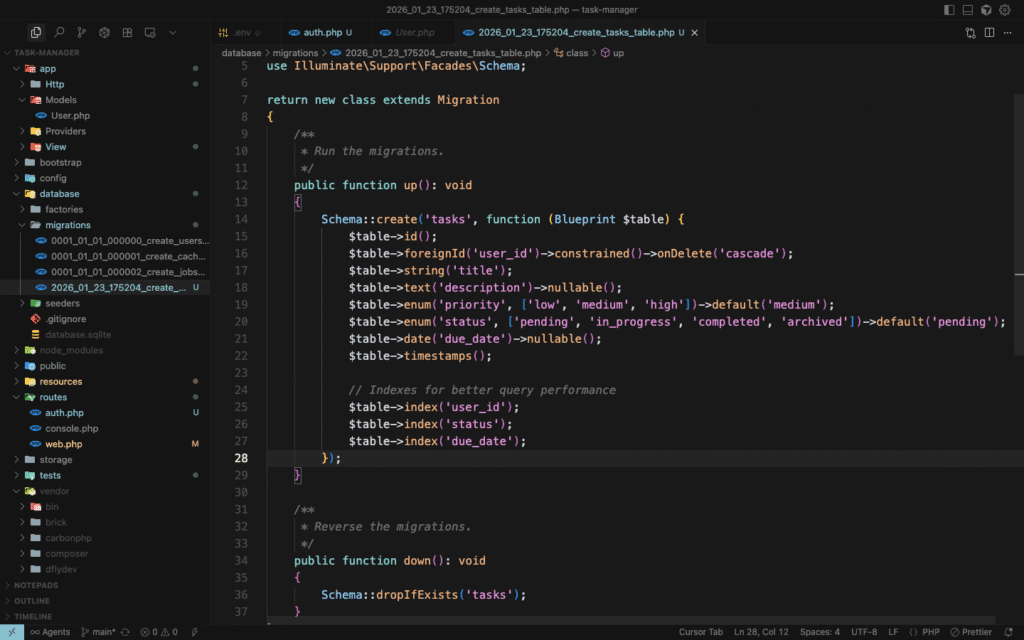
5.2 Edit the Migration File
Open the newly created file database/migrations/2026_01_18_123456_create_tasks_table.php:
<?php

use Illuminate\Database\Migrations\Migration;
use Illuminate\Database\Schema\Blueprint;
use Illuminate\Support\Facades\Schema;

return new class extends Migration
{
    /**
     * Run the migrations.
     */
    public function up(): void
    {
        Schema::create('tasks', function (Blueprint $table) {
            $table->id();
            $table->foreignId('user_id')->constrained()->onDelete('cascade');
            $table->string('title');
            $table->text('description')->nullable();
            $table->enum('priority', ['low', 'medium', 'high'])->default('medium');
            $table->enum('status', ['pending', 'in_progress', 'completed', 'archived'])->default('pending');
            $table->date('due_date')->nullable();
            $table->timestamps();

            // Indexes for better query performance
            $table->index('user_id');
            $table->index('status');
            $table->index('due_date');
        });
    }

    /**
     * Reverse the migrations.
     */
    public function down(): void
    {
        Schema::dropIfExists('tasks');
    }
};
Understanding the migration:
-
id()– Auto-incrementing primary key -
foreignId('user_id')->constrained()– Creates a foreign key to users table -
onDelete('cascade')– Delete tasks when user is deleted -
string('title')– VARCHAR column for task title -
text('description')->nullable()– TEXT column, optional -
enum()– Restricts values to specific options -
default()– Sets default value -
date('due_date')->nullable()– Optional due date -
timestamps()– Creates created_at and updated_at columns -
index()– Improves query performance on frequently searched columns
Step 6: Creating the Categories Migration
php artisan make:migration create_categories_tableEdit the generated file:
<?php

use Illuminate\Database\Migrations\Migration;
use Illuminate\Database\Schema\Blueprint;
use Illuminate\Support\Facades\Schema;

return new class extends Migration
{
    public function up(): void
    {
        Schema::create('categories', function (Blueprint $table) {
            $table->id();
            $table->foreignId('user_id')->constrained()->onDelete('cascade');
            $table->string('name');
            $table->string('color', 7)->default('#3B82F6'); // Hex color code
            $table->timestamps();

            // Ensure unique category names per user
            $table->unique(['user_id', 'name']);
            $table->index('user_id');
        });
    }

    public function down(): void
    {
        Schema::dropIfExists('categories');
    }
};
New concepts:
-
string('color', 7)– VARCHAR with max length 7 (for #RRGGBB) -
unique(['user_id', 'name'])– Composite unique constraint (users can’t have duplicate category names)
Step 7: Creating the Pivot Table Migration
php artisan make:migration create_category_task_tableEdit the file:
<?php

use Illuminate\Database\Migrations\Migration;
use Illuminate\Database\Schema\Blueprint;
use Illuminate\Support\Facades\Schema;

return new class extends Migration
{
    public function up(): void
    {
        Schema::create('category_task', function (Blueprint $table) {
            $table->id();
            $table->foreignId('category_id')->constrained()->onDelete('cascade');
            $table->foreignId('task_id')->constrained()->onDelete('cascade');
            $table->timestamps();

            // Prevent duplicate assignments
            $table->unique(['category_id', 'task_id']);
        });
    }

    public function down(): void
    {
        Schema::dropIfExists('category_task');
    }
};
Pivot table naming convention: Laravel expects pivot tables to be named with both table names in alphabetical order, singular form, separated by underscore: category_task.
Step 8: Creating Task Shares Migration
php artisan make:migration create_task_shares_tableEdit the file:
<?php

use Illuminate\Database\Migrations\Migration;
use Illuminate\Database\Schema\Blueprint;
use Illuminate\Support\Facades\Schema;

return new class extends Migration
{
    public function up(): void
    {
        Schema::create('task_shares', function (Blueprint $table) {
            $table->id();
            $table->foreignId('task_id')->constrained()->onDelete('cascade');
            $table->foreignId('shared_by_user_id')->constrained('users')->onDelete('cascade');
            $table->foreignId('shared_with_user_id')->constrained('users')->onDelete('cascade');
            $table->enum('permission', ['view', 'edit'])->default('view');
            $table->timestamps();

            // Prevent duplicate shares
            $table->unique(['task_id', 'shared_with_user_id']);
            $table->index('shared_with_user_id');
        });
    }

    public function down(): void
    {
        Schema::dropIfExists('task_shares');
    }
};
Note: constrained('users') explicitly specifies the related table when the column name doesn’t follow the convention.
Step 9: Creating Attachments Migration
php artisan make:migration create_attachments_tableEdit the file:
<?php

use Illuminate\Database\Migrations\Migration;
use Illuminate\Database\Schema\Blueprint;
use Illuminate\Support\Facades\Schema;

return new class extends Migration
{
    public function up(): void
    {
        Schema::create('attachments', function (Blueprint $table) {
            $table->id();
            $table->foreignId('task_id')->constrained()->onDelete('cascade');
            $table->foreignId('user_id')->constrained()->onDelete('cascade');
            $table->string('file_name');
            $table->string('file_path');
            $table->unsignedBigInteger('file_size'); // in bytes
            $table->string('mime_type');
            $table->timestamps();

            $table->index('task_id');
        });
    }

    public function down(): void
    {
        Schema::dropIfExists('attachments');
    }
};
Step 10: Running All Migrations
Now let’s create all these tables in our database:
php artisan migrate
Expected output:
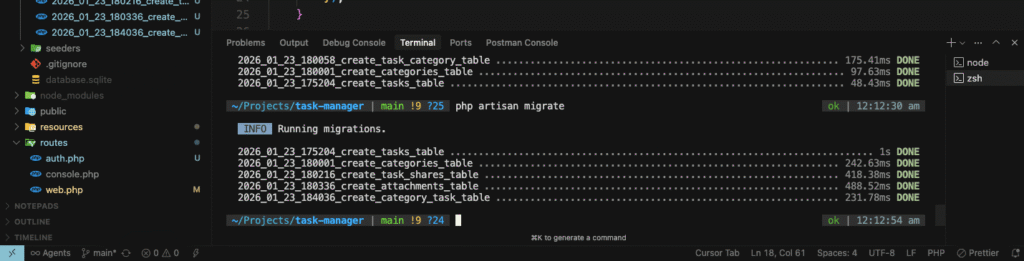
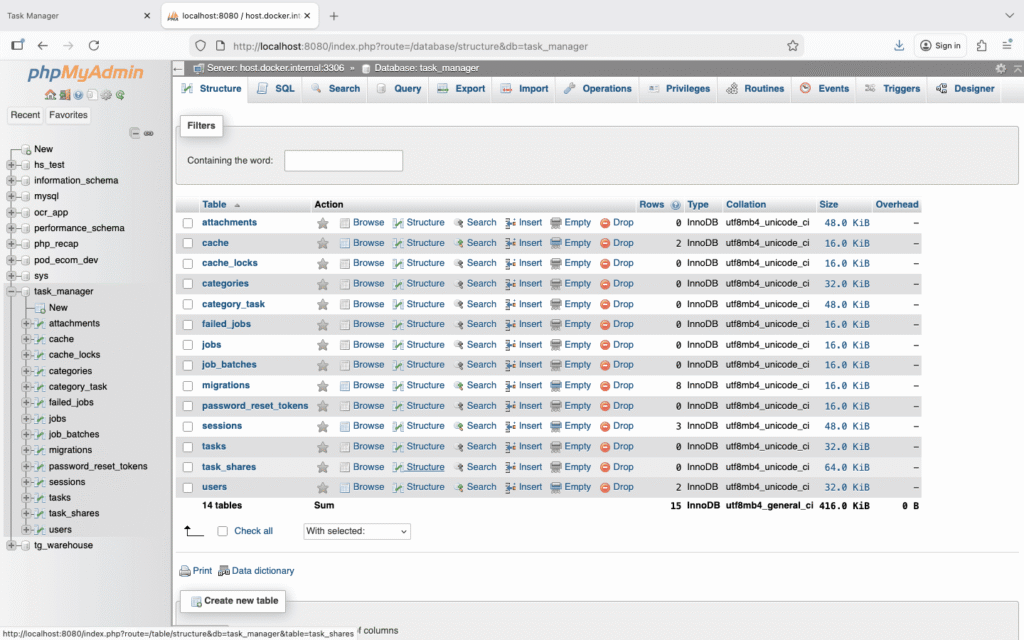
Verify Tables in Database
You can verify that the tables were created:
Using Tinker:
php artisan tinker
Then run:
DB::select('SHOW TABLES');
Using phpMyAdmin: Visit http://localhost/phpmyadmin and check your task_manager database.
Step 11: Creating Eloquent Models
Models represent database tables in your application. Let’s create models for our new tables.
11.1 Create Task Model
php artisan make:model TaskEdit app/Models/Task.php:
<?php

namespace App\Models;

use Illuminate\Database\Eloquent\Factories\HasFactory;
use Illuminate\Database\Eloquent\Model;
use Illuminate\Database\Eloquent\Relations\BelongsTo;
use Illuminate\Database\Eloquent\Relations\BelongsToMany;
use Illuminate\Database\Eloquent\Relations\HasMany;

class Task extends Model
{
    use HasFactory;

    protected $fillable = [
        'user_id',
        'title',
        'description',
        'priority',
        'status',
        'due_date',
    ];

    protected $casts = [
        'due_date' => 'date',
    ];

    /**
     * Get the user that owns the task.
     */
    public function user(): BelongsTo
    {
        return $this->belongsTo(User::class);
    }

    /**
     * Get the categories for the task.
     */
    public function categories(): BelongsToMany
    {
        return $this->belongsToMany(Category::class)->withTimestamps();
    }

    /**
     * Get the attachments for the task.
     */
    public function attachments(): HasMany
    {
        return $this->hasMany(Attachment::class);
    }

    /**
     * Get the shares for the task.
     */
    public function shares(): HasMany
    {
        return $this->hasMany(TaskShare::class);
    }

    /**
     * Scope a query to only include tasks of a given status.
     */
    public function scopeStatus($query, $status)
    {
        return $query->where('status', $status);
    }

    /**
     * Scope a query to only include overdue tasks.
     */
    public function scopeOverdue($query)
    {
        return $query->where('due_date', '<', now())
                     ->where('status', '!=', 'completed');
    }
}
Understanding the Task model:
-
$fillable– Mass-assignable attributes -
$casts– Automatically converts due_date to Carbon instance -
user()– Defines relationship: task belongs to one user -
categories()– Many-to-many relationship with categories -
withTimestamps()– Maintains created_at/updated_at in pivot table -
scopeStatus()– Query scope for filtering by status -
scopeOverdue()– Query scope for overdue tasks
11.2 Create Category Model
php artisan make:model CategoryEdit app/Models/Category.php:
<?php

namespace App\Models;

use Illuminate\Database\Eloquent\Factories\HasFactory;
use Illuminate\Database\Eloquent\Model;
use Illuminate\Database\Eloquent\Relations\BelongsTo;
use Illuminate\Database\Eloquent\Relations\BelongsToMany;

class Category extends Model
{
    use HasFactory;

    protected $fillable = [
        'user_id',
        'name',
        'color',
    ];

    /**
     * Get the user that owns the category.
     */
    public function user(): BelongsTo
    {
        return $this->belongsTo(User::class);
    }

    /**
     * Get the tasks for the category.
     */
    public function tasks(): BelongsToMany
    {
        return $this->belongsToMany(Task::class)->withTimestamps();
    }
}
11.3 Create TaskShare Model
php artisan make:model TaskShareEdit app/Models/TaskShare.php:
<?php

namespace App\Models;

use Illuminate\Database\Eloquent\Factories\HasFactory;
use Illuminate\Database\Eloquent\Model;
use Illuminate\Database\Eloquent\Relations\BelongsTo;

class TaskShare extends Model
{
    use HasFactory;

    protected $fillable = [
        'task_id',
        'shared_by_user_id',
        'shared_with_user_id',
        'permission',
    ];

    /**
     * Get the task that is shared.
     */
    public function task(): BelongsTo
    {
        return $this->belongsTo(Task::class);
    }

    /**
     * Get the user who shared the task.
     */
    public function sharedBy(): BelongsTo
    {
        return $this->belongsTo(User::class, 'shared_by_user_id');
    }

    /**
     * Get the user with whom the task is shared.
     */
    public function sharedWith(): BelongsTo
    {
        return $this->belongsTo(User::class, 'shared_with_user_id');
    }
}
11.4 Create Attachment Model
php artisan make:model AttachmentEdit app/Models/Attachment.php:
<?php

namespace App\Models;

use Illuminate\Database\Eloquent\Factories\HasFactory;
use Illuminate\Database\Eloquent\Model;
use Illuminate\Database\Eloquent\Relations\BelongsTo;

class Attachment extends Model
{
    use HasFactory;

    protected $fillable = [
        'task_id',
        'user_id',
        'file_name',
        'file_path',
        'file_size',
        'mime_type',
    ];

    /**
     * Get the task that owns the attachment.
     */
    public function task(): BelongsTo
    {
        return $this->belongsTo(Task::class);
    }

    /**
     * Get the user that uploaded the attachment.
     */
    public function user(): BelongsTo
    {
        return $this->belongsTo(User::class);
    }

    /**
     * Get human-readable file size.
     */
    public function getFileSizeHumanAttribute(): string
    {
        $bytes = $this->file_size;
        $units = ['B', 'KB', 'MB', 'GB'];

        for ($i = 0; $bytes > 1024; $i++) {
            $bytes /= 1024;
        }

        return round($bytes, 2) . ' ' . $units[$i];
    }
}
New concept: getFileSizeHumanAttribute() is an accessor – you can access it as $attachment->file_size_human.
11.5 Update User Model
Edit app/Models/User.php to add relationships:
<?php

namespace App\Models;

use Illuminate\Foundation\Auth\User as Authenticatable;
use Illuminate\Database\Eloquent\Relations\HasMany;

class User extends Authenticatable
{
    // ... existing code ...

    /**
     * Get the tasks for the user.
     */
    public function tasks(): HasMany
    {
        return $this->hasMany(Task::class);
    }

    /**
     * Get the categories for the user.
     */
    public function categories(): HasMany
    {
        return $this->hasMany(Category::class);
    }

    /**
     * Get tasks shared by this user.
     */
    public function sharedTasks(): HasMany
    {
        return $this->hasMany(TaskShare::class, 'shared_by_user_id');
    }

    /**
     * Get tasks shared with this user.
     */
    public function receivedShares(): HasMany
    {
        return $this->hasMany(TaskShare::class, 'shared_with_user_id');
    }
}
Step 12: Testing Models with Tinker
Let’s test our models and relationships using Laravel Tinker.
First run composer dump-autoload
php artisan tinker
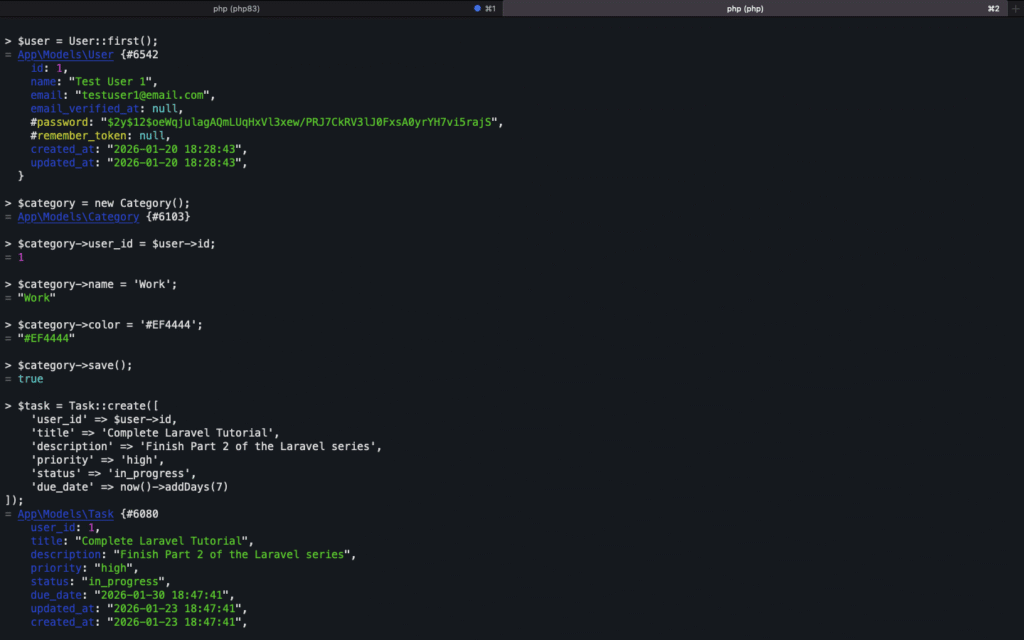
Create a Test Category
$user = User::first(); // Get the first user

$category = new Category();
$category->user_id = $user->id;
$category->name = 'Work';
$category->color = '#EF4444';
$category->save();

// Or use mass assignment
Category::create([
    'user_id' => $user->id,
    'name' => 'Personal',
    'color' => '#10B981'
]);
Create a Test Task
$task = Task::create([
    'user_id' => $user->id,
    'title' => 'Complete Laravel Tutorial',
    'description' => 'Finish Part 2 of the Laravel series',
    'priority' => 'high',
    'status' => 'in_progress',
    'due_date' => now()->addDays(7)
]);
Test Relationships
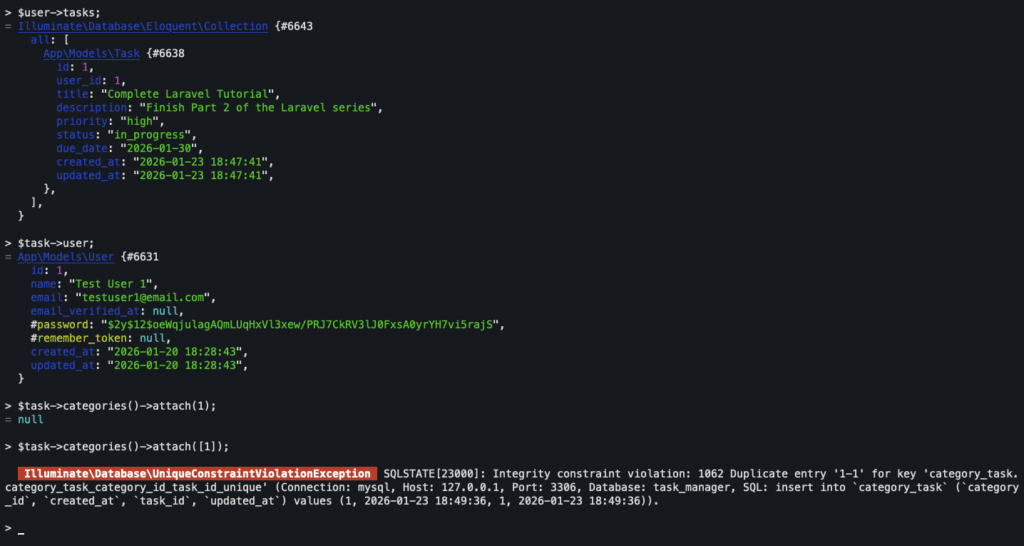
// Get user's tasks
$user->tasks;
// Get task's owner
$task->user;
// Attach categories to task
$task->categories()->attach([1, 2]); // Category IDs
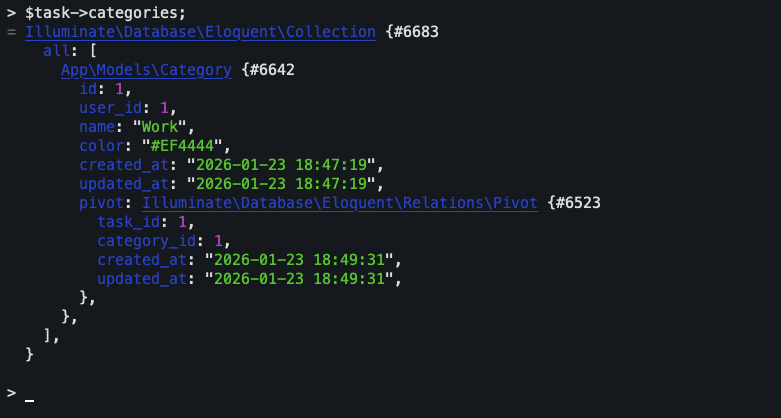
// Get task's categories
$task->categories;
// Detach a category
$task->categories()->detach(1);
Query Examples
// Get all pending tasks
Task::status('pending')->get();

// Get overdue tasks
Task::overdue()->get();

// Get tasks with specific category
Category::find(1)->tasks;

// Get user's completed tasks
User::first()->tasks()->where('status', 'completed')->get();
Exit Tinker:
exit
Step 13: Understanding Eloquent Relationships
Let’s dive deeper into the relationships we’ve defined.
One-to-Many Relationships
User has many Tasks:
// In User model
public function tasks(): HasMany
{
    return $this->hasMany(Task::class);
}

// Usage
$user = User::find(1);
$tasks = $user->tasks; // Get all tasks for this user
Task belongs to User:
// In Task model
public function user(): BelongsTo
{
    return $this->belongsTo(User::class);
}

// Usage
$task = Task::find(1);
$owner = $task->user; // Get the owner of this task
Many-to-Many Relationships
Task belongs to many Categories:
// In Task model
public function categories(): BelongsToMany
{
    return $this->belongsToMany(Category::class)->withTimestamps();
}

// Usage
$task = Task::find(1);

// Attach categories
$task->categories()->attach([1, 2, 3]);

// Sync categories (replace all)
$task->categories()->sync([1, 2]);

// Detach specific categories
$task->categories()->detach([1]);

// Detach all
$task->categories()->detach();
Querying Relationships
// Eager loading (prevents N+1 problem)
$tasks = Task::with(['user', 'categories', 'attachments'])->get();

// Conditional eager loading
$tasks = Task::with(['categories' => function ($query) {
    $query->where('name', 'Work');
}])->get();

// Check relationship existence
$tasksWithCategories = Task::has('categories')->get();
$tasksWithAtLeast3Categories = Task::has('categories', '>=', 3)->get();

// Where has (filter by relationship)
$workTasks = Task::whereHas('categories', function ($query) {
    $query->where('name', 'Work');
})->get();
Step 14: Database Seeding (Optional)
Seeders help populate your database with test data.
Create a Seeder
php artisan make:seeder CategorySeederEdit database/seeders/CategorySeeder.php:
<?php

namespace Database\Seeders;

use App\Models\User;
use App\Models\Category;
use Illuminate\Database\Seeder;

class CategorySeeder extends Seeder
{
    public function run(): void
    {
        $user = User::first();

        $categories = [
            ['name' => 'Work', 'color' => '#EF4444'],
            ['name' => 'Personal', 'color' => '#10B981'],
            ['name' => 'Urgent', 'color' => '#F59E0B'],
            ['name' => 'Shopping', 'color' => '#8B5CF6'],
            ['name' => 'Health', 'color' => '#EC4899'],
        ];

        foreach ($categories as $category) {
            Category::create([
                'user_id' => $user->id,
                'name' => $category['name'],
                'color' => $category['color'],
            ]);
        }
    }
}
Run the Seeder
php artisan db:seed --class=CategorySeederStep 15: Migration Best Practices
Rolling Back Migrations
If you make a mistake:
# Rollback last batch
php artisan migrate:rollback

# Rollback all migrations
php artisan migrate:reset

# Rollback and re-run all migrations
php artisan migrate:refresh

# Rollback, re-run, and seed
php artisan migrate:refresh --seed
Checking Migration Status
php artisan migrate:statusCreating Indexes
Always add indexes to columns frequently used in WHERE clauses:
$table->index('user_id');
$table->index(['status', 'due_date']); // Composite index
Foreign Key Constraints
Always use proper foreign key constraints:
// Good - with constraint
$table->foreignId('user_id')->constrained()->onDelete('cascade');

// Not recommended - without constraint
$table->unsignedBigInteger('user_id');
Common Migration Errors and Solutions
Error 1: “SQLSTATE[42S01]: Base table or view already exists.”
Cause: Table already exists in the database
Solution:
php artisan migrate:rollback
php artisan migrate
Error 2: “SQLSTATE[23000]: Integrity constraint violation”
Cause: Foreign key constraint fails (referenced table doesn’t exist)
Solution: Ensure migrations run in the correct order. The table being referenced must be created first.
Error 3: “Syntax error or access violation: 1071 Specified key was too long”
Cause: String column too long for index (common with older MySQL versions)
Solution: In app/Providers/AppServiceProvider.php:
use Illuminate\Support\Facades\Schema;

public function boot(): void
{
    Schema::defaultStringLength(191);
}
Testing Your Authentication System
Let’s perform comprehensive testing of our authentication.
Test 1: Registration
- Visit
/register - Create account with:
- Name: Test User
- Email: test@example.com
- Password: password123
Expected: Redirected to dashboard, logged in automatically
Test 2: Logout and Login
- Click logout
- Visit
/login - Enter credentials
- Click “Log in”
Expected: Redirected to dashboard
Test 3: Password Reset
- Logout
- Click “Forgot password?”
- Enter your email
- Check the terminal running
npm run devfor email output (in local development)
Test 4: Protected Routes
- Logout
- Try to visit
/dashboarddirectly
Expected: Redirected to login page
Test 5: Profile Update
- Login
- Visit
/profile - Update your name
- Click “Save”
Expected: Profile updated successfully
Understanding Middleware
Middleware provides a convenient mechanism for filtering HTTP requests.
Auth Middleware
Open routes/web.php:
Route::middleware('auth')->group(function () {
    Route::get('/dashboard', function () {
        return view('dashboard');
    })->name('dashboard');
});
Routes inside middleware('auth') require authentication.
Guest Middleware
Route::middleware('guest')->group(function () {
    Route::get('/login', [LoginController::class, 'index']);
});
Routes inside middleware('guest') are only accessible to non-authenticated users.
Creating Custom Middleware
php artisan make:middleware CheckTaskOwnership
We’ll implement this in Part 3!
Security Best Practices
1. Never Store Plain Passwords
Laravel automatically hashes passwords using bcrypt:
// Automatically hashed
User::create([
    'password' => 'secret123'
]);

// Manual hashing (if needed)
$hashedPassword = Hash::make('secret123');
2. Use Mass Assignment Protection
Always define $fillable or $guarded:
// Good - explicitly define fillable fields
protected $fillable = ['title', 'description'];

// Alternative - guard sensitive fields
protected $guarded = ['is_admin'];
3. CSRF Protection
Laravel includes CSRF protection. Always use @csrf in forms:
<form method="POST" action="/tasks">
    @csrf
    <!-- form fields -->
</form>
4. SQL Injection Prevention
Eloquent automatically protects against SQL injection:
// Safe - parameterized query
Task::where('user_id', $userId)->get();

// Dangerous - never do this
DB::select("SELECT * FROM tasks WHERE user_id = " . $userId);
What We’ve Accomplished
Congratulations! You’ve built a solid foundation for your Task Manager application:
- Installed and configured Laravel Breeze authentication
- Created a complete authentication system (register, login, logout, password reset)
- Designed a comprehensive database structure for task management
- Created migrations for all necessary tables
- Built Eloquent models with proper relationships
- Tested authentication and database functionality
- Learned about Eloquent relationships and querying
- Implemented security best practices
What’s Next?
In Part 3: Building CRUD Operations, we’ll:
- Create controllers for managing tasks
- Build forms for creating and editing tasks
- Implement validation
- Create views with Blade templates
- Add pagination and filtering
- Implement search functionality
Quick Recap
Commands We Used
# Authentication
composer require laravel/breeze --dev
php artisan breeze:install blade
npm install && npm run dev

# Migrations
php artisan make:migration create_tasks_table
php artisan migrate
php artisan migrate:rollback
php artisan migrate:status

# Models
php artisan make:model Task
php artisan make:model Category

# Testing
php artisan tinker
Key Concepts Learned
- Authentication flow and middleware
- Database design and relationships
- Migration file structure
- Eloquent ORM and models
- Query scopes and accessors
- Relationship types (one-to-many, many-to-many)
- Eager loading and N+1 problem
- Security best practices
Additional Resources
- Laravel Authentication Docs: https://laravel.com/docs/12.x/authentication
- Eloquent Relationships: https://laravel.com/docs/12.x/eloquent-relationships
- Database Migrations: https://laravel.com/docs/12.x/migrations
- Eloquent ORM: https://laravel.com/docs/12.x/eloquent
Homework Challenge
Before moving to Part 3, try these exercises:
-
Create a Task via Tinker:
- Use Tinker to create 5 tasks with different priorities and statuses
-
Test Relationships:
- Create categories and attach them to tasks
- Query tasks that belong to specific categories
-
Create a Seeder:
- Build a TaskSeeder that creates 20 sample tasks
-
Explore Accessors:
- Add an accessor to the Task model that returns a formatted due date
Share your progress in the comments! I’d love to see what you’ve built.
Drop your questions in the comments, and I’ll help you out!
Missed Part 1? Go back to Part 1: Environment Setup