Welcome to the first part of our comprehensive Laravel 12 tutorial series! In this guide, we’ll build a complete Task Management application from scratch. By the end of this series, you’ll have a fully functional web application with user authentication, CRUD operations, file uploads, and more.
But before we dive into coding, we need to set up our development environment properly. This tutorial will walk you through every step of installing Laravel 12 and preparing your system for development.
What You’ll Learn in This Tutorial
- Understanding Laravel’s system requirements
- Installing PHP, Composer, and Node.js
- Creating your first Laravel 12 project
- Configuring your database
- Understanding Laravel’s project structure
- Running your development server
Prerequisites
This tutorial assumes you have:
- Basic understanding of PHP programming
- Familiarity with command-line interfaces
- A computer running Windows, macOS, or Linux
- Willingness to learn and experiment
Don’t worry if you’re not an expert! We’ll explain everything step by step.
What is Laravel?
Laravel is a powerful PHP framework that makes web development enjoyable and creative. It follows the MVC (Model-View-Controller) pattern and provides elegant syntax that’s easy to understand. Laravel handles common tasks like routing, authentication, sessions, and caching, allowing you to focus on building amazing applications.
Why Choose Laravel 12?
Laravel 12, the latest release, introduces several improvements, including better performance, enhanced developer experience, and updated dependencies. It’s the perfect framework for beginners because of its excellent documentation and supportive community.
System Requirements
Before installing Laravel 12, ensure your system meets these requirements:
- PHP: Version 8.3 or higher
- Composer: Latest version
- Database: MySQL 5.7+, PostgreSQL 10+, SQLite 3.8+, or SQL Server 2017+
- Node.js: Version 18 or higher (for frontend assets)
- NPM: Version 9 or higher
Step 1: Installing PHP
PHP is the foundation of Laravel. Let’s install it based on your operating system.
For Windows Users
- Download XAMPP or Laragon (recommended for Laravel development):
- XAMPP: Visit https://www.apachefriends.org
- Laragon: Visit https://laragon.org (lighter and faster)
- Install Laragon (Recommended):
- Download the latest Laragon Full version
- Run the installer and follow the installation wizard
- Laragon includes PHP 8.3, MySQL, and other necessary tools
- Verify PHP installation:
php -vYou should see output similar to:PHP 8.3.x (cli) (built: ...)
For macOS Users
The easiest way to install PHP on macOS is using Homebrew:
- Install Homebrew (if not already installed):
/bin/bash -c "$(curl -fsSL https://raw.githubusercontent.com/Homebrew/install/HEAD/install.sh)" - Install PHP 8.3:
brew install php@8.3 - Link PHP to make it accessible:
brew link php@8.3 - Verify installation:
php -v
For Linux Users (Ubuntu/Debian)
- Update package list:
sudo apt update - Install PHP 8.3 and required extensions:
sudo apt install php8.3 php8.3-cli php8.3-common php8.3-mysql php8.3-xml php8.3-curl php8.3-mbstring php8.3-zip php8.3-gd - Verify installation:
php -v
Step 2: Installing Composer
Composer is PHP’s dependency manager. Laravel uses Composer to manage its packages and dependencies.
Installing Composer on All Platforms
- Visit https://getcomposer.org/download/
-
For Windows:
- Download and run Composer-Setup.exe
- Follow the installation wizard
- The installer will automatically detect your PHP installation
-
For macOS/Linux:
php -r "copy('https://getcomposer.org/installer', 'composer-setup.php');" php composer-setup.php php -r "unlink('composer-setup.php');" sudo mv composer.phar /usr/local/bin/composer - Verify Composer installation:
composer --versionExpected output:Composer version 2.x.x
Step 3: Installing Node.js and NPM
Node.js and NPM are required for compiling frontend assets (CSS, JavaScript) in Laravel.
For All Platforms
- Visit https://nodejs.org
- Download the LTS (Long Term Support) version
- Run the installer and follow the setup wizard
- Verify installation:
node -v npm -v
Pro Tip: If you work with multiple Node versions, consider using NVM (Node Version Manager) instead.
Step 4: Installing a Database (MySQL)
Laravel needs a database to store application data. We’ll use MySQL for this tutorial.
For Windows (Using Laragon)
If you installed Laragon, MySQL is already included! Skip to verification.
For Windows (Using XAMPP)
MySQL comes bundled with XAMPP. Just start the MySQL service from the XAMPP control panel.
For macOS
brew install mysql
brew services start mysql
For Linux (Ubuntu/Debian)
sudo apt install mysql-server
sudo systemctl start mysql
sudo mysql_secure_installation
Verify MySQL Installation
mysql --versionStep 5: Creating Your First Laravel 12 Project
Now comes the exciting part! Let’s create your first Laravel project.
Method 1: Using Composer (Recommended)
- Open your terminal or command prompt
- Navigate to where you want to create your project:
cd C:/laragon/www # Windows (Laragon) cd ~/Sites # macOS cd ~/projects # Linux - Create a new Laravel project named “task-manager”:
composer create-project laravel/laravel task-managerThis command will:- Download Laravel and all its dependenciesSet up the basic project structureGenerate an application keyCreate configuration files
Method 2: Using Laravel Installer (Alternative)
- Install the Laravel installer globally:
composer global require laravel/installer - Create a new project:
laravel new task-manager
Step 6: Understanding Laravel’s Project Structure
Once installation is complete, navigate into your project:
cd task-manager
Let’s explore the key directories and files:
task-manager/
├── app/                  # Application core code
│   ├── Http/
│   │   ├── Controllers/  # Your application controllers
│   │   └── Middleware/   # HTTP middleware
│   ├── Models/           # Eloquent models (database)
│   └── Providers/        # Service providers
├── bootstrap/            # Framework bootstrap files
├── config/              # Configuration files
├── database/
│   ├── migrations/      # Database migrations
│   ├── seeders/         # Database seeders
│   └── factories/       # Model factories
├── public/              # Publicly accessible files
│   └── index.php        # Application entry point
├── resources/
│   ├── views/           # Blade templates
│   ├── css/             # CSS files
│   └── js/              # JavaScript files
├── routes/
│   ├── web.php          # Web routes
│   └── api.php          # API routes
├── storage/             # Compiled files, logs, cache
├── tests/               # Automated tests
├── vendor/              # Composer dependencies
├── .env                 # Environment configuration
├── artisan              # Command-line tool
├── composer.json        # PHP dependencies
└── package.json         # Node dependencies
Key Files to Know
- .env – Environment variables (database credentials, app settings)
- artisan – Laravel’s command-line tool
- composer.json – PHP package dependencies
- routes/web.php – Where you define your web routes
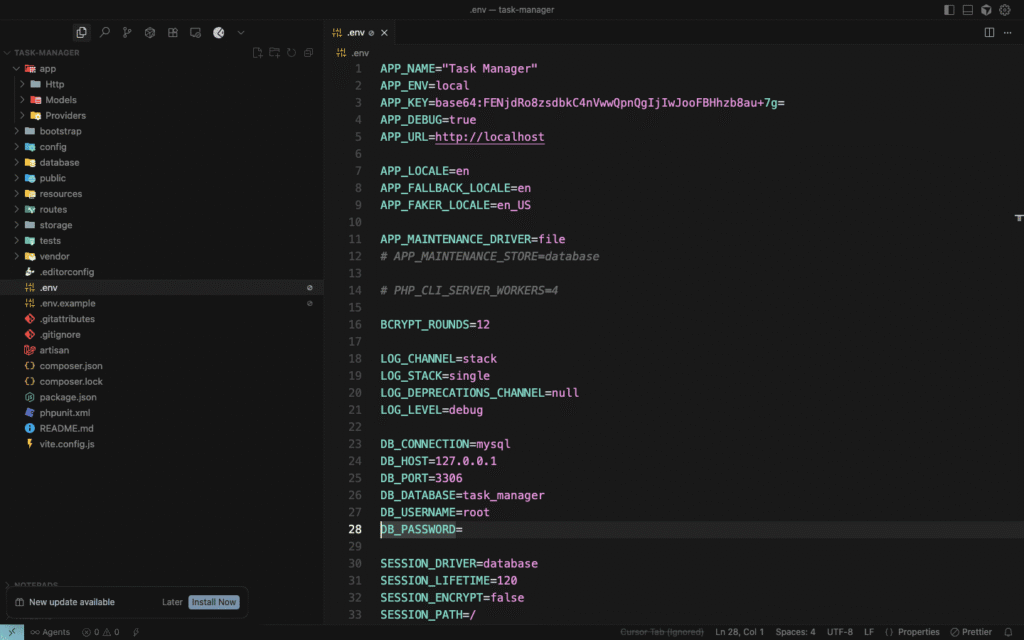
Step 7: Configuring Your Environment
Laravel uses a .env file to store environment-specific configuration. Let’s set it up.
1. Open the .env File
Located in your project root, open .env in your favorite code editor (VS Code, Sublime Text, PHPStorm, etc.).
2. Configure Application Settings
APP_NAME="Task Manager"
APP_ENV=local
APP_KEY=base64:...  # Already generated
APP_DEBUG=true
APP_URL=http://localhost:8000
3. Configure Database Connection
Update these lines to match your database setup:
DB_CONNECTION=mysql
DB_HOST=127.0.0.1
DB_PORT=3306
DB_DATABASE=task_manager
DB_USERNAME=root
DB_PASSWORD=
For Laragon users: The password is usually empty.
For XAMPP users: The password is usually empty.
For macOS/Linux: Use the password you set during MySQL installation.
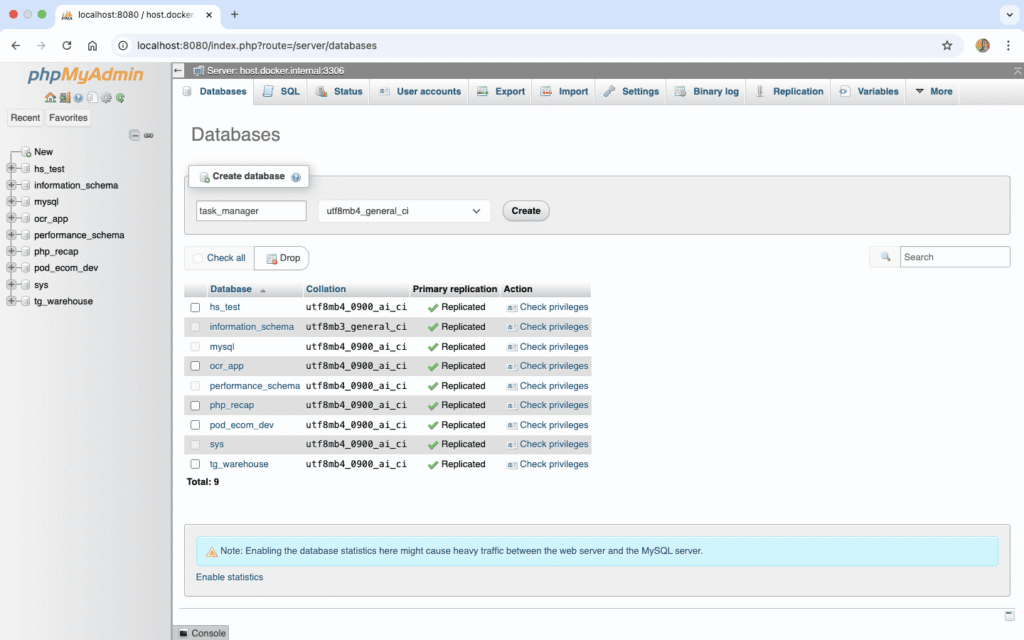
Step 8: Creating Your Database
Before running Laravel, we need to create the database.
Using MySQL Command Line
- Access MySQL:
mysql -u root -p - Create the database:
CREATE DATABASE task_manager; EXIT;
Using phpMyAdmin
If you’re using XAMPP or Laragon:
- Open your browser and go to
http://localhost/phpmyadmin - Click “New” in the left sidebar
- Enter
task_manageras the database name - Click “Create”
Step 9: Running Database Migrations
Laravel includes some default migrations. Let’s run them to create initial tables.
php artisan migrate
You should see output like:
Migration table created successfully.
Migrating: 2014_10_12_000000_create_users_table
Migrated:  2014_10_12_000000_create_users_table
Migrating: 2014_10_12_100000_create_password_resets_table
Migrated:  2014_10_12_100000_create_password_resets_table
...
This creates essential tables like users, password_resets, and others.

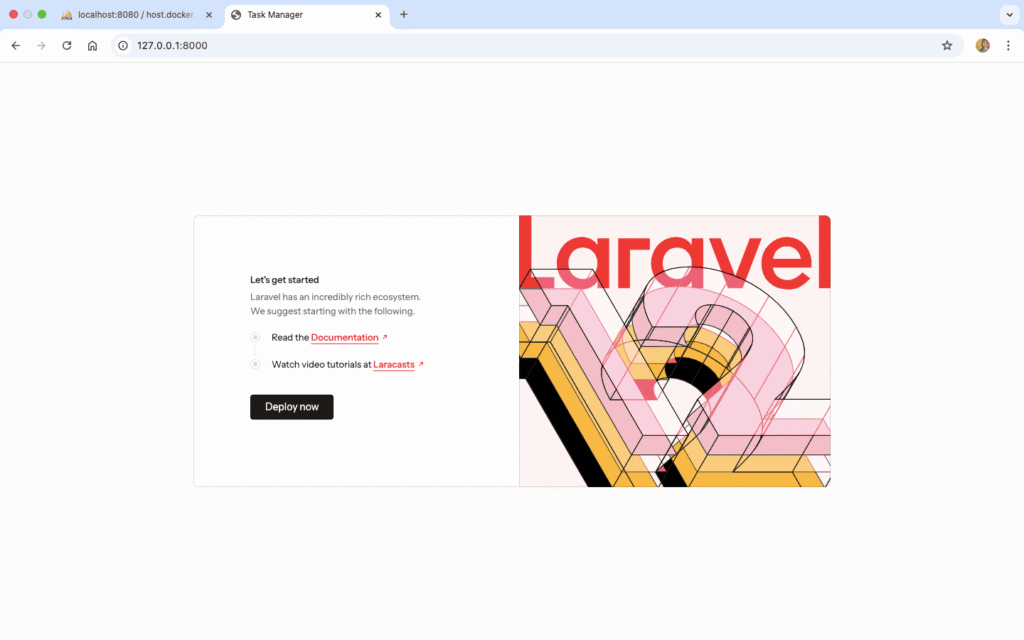
Step 10: Starting the Development Server
Let’s see your Laravel application in action!
php artisan serve
You should see:
INFO  Server running on [http://127.0.0.1:8000].

Press Ctrl+C to stop the server
Accessing Your Application
Open your web browser and visit: http://localhost:8000
You should see Laravel’s beautiful welcome page!
Common Port Issues
If port 8000 is already in use, you can specify a different port:
php artisan serve --port=8080
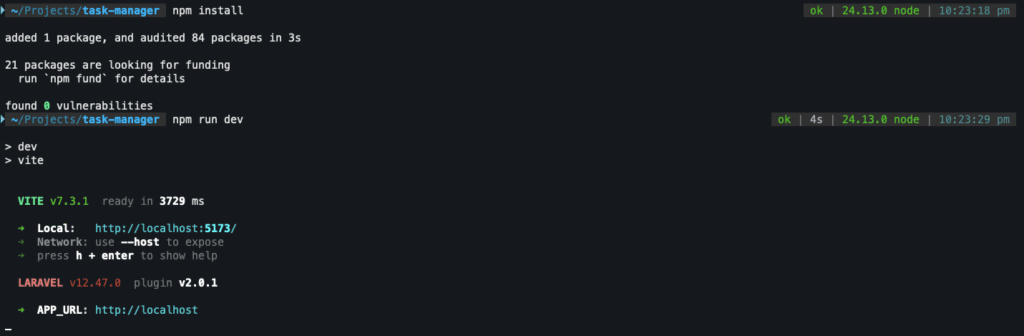
Step 11: Installing Frontend Dependencies
Laravel uses Vite for compiling frontend assets. Let’s set that up.
- Install Node dependencies:
npm install - Run the development server:
npm run dev
Keep this running in a separate terminal window while developing.
Verifying Your Installation
Let’s make sure everything is working correctly.
Check PHP Version
php -v
Expected: PHP 8.3.x or higher
Check Composer
composer --version
Expected: Composer version 2.x.x
Check Node & NPM
node -v
npm -v
Expected: Node v18.x or higher, NPM v9.x or higher
Check Laravel Installation
php artisan --version
Expected: Laravel Framework 12.x.x
Check Database Connection
php artisan migrate:status
This shows all migrations and their status.
Troubleshooting Common Issues
Issue 1: “php command not found”
Solution: PHP is not in your system PATH.
- Windows: Restart your computer after installing Laragon/XAMPP
-
macOS/Linux: Add PHP to your PATH in
.bashrcor.zshrc
Issue 2: “composer command not found”
Solution: Composer is not globally installed.
- Reinstall Composer and ensure “Add to PATH” is checked (Windows)
- For macOS/Linux, move composer.phar to /usr/local/bin/
Issue 3: Database Connection Error
Solution: Check your .env file:
- Verify database name matches what you created
- Check username and password
- Ensure MySQL service is running
Issue 4: Port 8000 Already in Use
Solution: Use a different port:
php artisan serve --port=8080
Issue 5: Permission Errors (Linux/macOS)
Solution: Set proper permissions:
sudo chmod -R 775 storage bootstrap/cache
sudo chown -R $USER:www-data storage bootstrap/cache
Best Practices for Development Environment
1. Use a Code Editor with Laravel Support
Recommended editors:
- VS Code with Laravel Extension Pack
- PHPStorm (paid, but excellent Laravel support)
- Sublime Text with Laravel packages
2. Use Version Control
Initialize Git in your project:
git init
git add .
git commit -m "Initial Laravel 12 installation"
3. Keep Dependencies Updated
Regularly update your dependencies:
composer update
npm update
4. Use Laravel Debugbar (Optional but Helpful)
Install for better debugging during development:
composer require barryvdh/laravel-debugbar --dev
Understanding Artisan Commands
Artisan is Laravel’s command-line interface. Here are essential commands you’ll use frequently:
# List all available commands
php artisan list

# Clear application cache
php artisan cache:clear

# Clear configuration cache
php artisan config:clear

# Create a new controller
php artisan make:controller TaskController

# Create a new model
php artisan make:model Task

# Create a migration
php artisan make:migration create_tasks_table

# Run migrations
php artisan migrate

# Rollback last migration
php artisan migrate:rollback

# Start development server
php artisan serve

# Enter tinker (Laravel REPL)
php artisan tinker
What’s Next?
Congratulations! You’ve successfully set up your Laravel 12 development environment and created your first Laravel project. Your development environment is now ready for building the Task Manager application.
In Part 2 of this series, we’ll cover:
- Setting up user authentication with Laravel Breeze
- Creating database migrations for our tasks table
- Understanding Eloquent ORM and models
- Building relationships between users and tasks
- Testing authentication functionality
Quick Recap
In this tutorial, you learned:
- How to install PHP, Composer, and Node.js
- How to create a new Laravel 12 project
- Understanding Laravel’s project structure
- Configuring your environment and database
- Running migrations and starting the development server
- Essential Artisan commands for development
Additional Resources
- Official Laravel Documentation: https://laravel.com/docs/12.x
- Laracasts: https://laracasts.com (Free Laravel video tutorials)
- Laravel News: https://laravel-news.com
- Laravel Community: https://laracasts.com/discuss
Need Help?
If you encounter any issues during setup, feel free to:
- Check the official Laravel documentation
- Ask questions in the comments below
- Join Laravel communities on Discord or Reddit
- Review the troubleshooting section above
Ready for Part 2? Follow next in this series: Authentication and Database Setup .